Power tools lose their edge fast when a battery starts acting up. Milwaukee M18 batteries pack smart electronics that protect cells from heat, overload, and deep discharge. Safety systems sometimes lock the battery, which makes it look dead even though cells still hold life.
Resetting helps clear common faults and brings power back without costly replacements. This guide explains why M18 batteries stop working, what signs point to a reset need, and how a simple reset can restore normal charging.
Clear steps save time on job sites and reduce frustration during projects. Tool owners gain better control over battery health with the right reset method. Proper handling also extends runtime and protects long-term performance.
DIY users and pros alike benefit from understanding this process. Confidence grows once the reset steps make sense. Reliable power keeps work smooth and stress low.
How to Reset Milwaukee M18 Battery?
Milwaukee M18 batteries use smart control systems. These systems protect the battery and the tool. Protection helps safety but can cause confusion.
A battery may stop charging even though it still holds power. A reset can clear this problem. This guide explains the reset process with deep detail. Every step stays simple and clear.
How Milwaukee M18 Batteries Work?
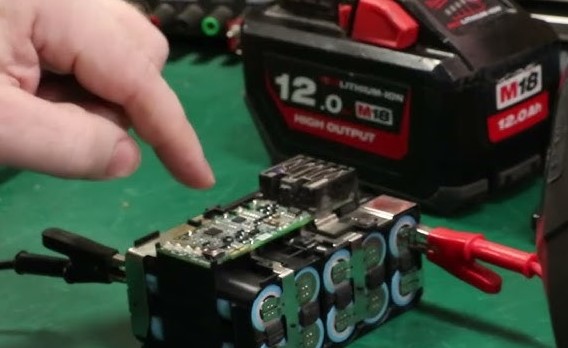
Milwaukee M18 batteries contain lithium-ion cells. Each cell stores energy and sends power to the tool. A control board sits inside the battery. This board checks voltage, heat, and current flow.
The board stops power during unsafe conditions. Low voltage triggers shutdown. High heat causes lockout. Sudden overload blocks output.
These actions protect the battery but may cause charging failure. A reset clears stored error states. The battery then connects with the charger again.
Signs a Reset Is Needed
Battery issues show clear signs. Tools stop working suddenly. Charger lights flash red and green. Charger shows green light too fast.
Battery indicator lights stay off. Tools run for a few seconds and shut down. These signs point to protection mode. Reset methods help in most cases.
Battery Safety Rules
Check battery temperature
Hot batteries fail to charge. Let the battery cool for at least thirty minutes. Normal room air works best.
Inspect battery shell
Cracks, swelling, or leaks show internal damage. Reset steps will not fix this. Replacement stays the only safe option.
Use clean power contacts
Metal contacts transfer energy. Dirt blocks current flow. Clean contacts before any reset attempt.
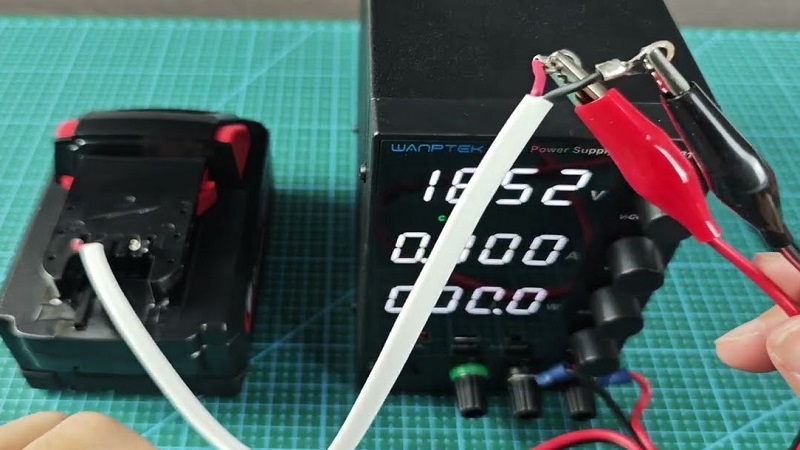
Reset Method 1: Charger Power Reset
Why this method works
Chargers store leftover energy. Stored power may confuse battery electronics. Power removal clears charger memory.
Step-by-step process
Remove the battery from the charger. Unplug the charger from the wall outlet. Wait ten to fifteen minutes. This wait allows full discharge inside the charger.
Plug the charger back in. Insert the battery firmly. Watch the indicator light. A solid red light means normal charging. Flashing red and green means the issue remains.
Reset Method 2: Full Battery Discharge
Purpose of full discharge
Lithium-ion batteries enter sleep mode at low voltage. Sleep mode blocks charging. Full discharge wakes the battery control board.
Detailed steps
Insert the battery into a tool. Turn the tool on. Let the tool run without load. Continue until the tool stops fully. Remove the battery from the tool.
Rest the battery for thirty minutes. Place the battery on the charger. Charging should begin within a few seconds. This method works best for batteries unused for long periods.
Reset Method 3: Contact Cleaning Reset
Importance of clean terminals
Power travels through small metal plates. Oil, dust, or corrosion reduces contact strength. Weak contact causes charging errors.
Cleaning steps
Use a dry cloth or soft brush. Wipe all metal contacts on the battery. Clean the charger terminals the same way. Avoid water or chemicals. Insert the battery again and check charging status.
Reset Method 4: Temperature Balance Reset
Why temperature matters
Battery chemistry reacts to heat and cold. Extreme cold slows chemical reactions. Heat triggers protection mode.
Steps to balance temperature
Move the battery to a room with normal temperature. Leave the battery untouched for one hour. Place the battery on the charger after the wait. This step fixes many false error signals.
Battery Health Data Explained
Lithium-ion cells work best between 20% and 80% charge. Deep discharge below safe voltage causes stress. Frequent deep drain shortens lifespan.
Milwaukee M18 batteries average 500 to 800 charge cycles. Proper care extends this range. Poor care reduces cycle count fast.
Storage and Usage Tips
Proper storage level
Half charge suits long storage. Fully charged storage increases stress. Empty storage causes sleep mode.
Correct charging habits
Remove the battery after full charge. Long charging time adds heat stress.
Tool matching
High-draw tools drain batteries faster. Large tools need high-capacity packs.
When Reset Will Not Work?
Cell damage prevents recovery. Overheating damage blocks charging permanently. Water exposure destroys internal circuits. Swollen batteries pose fire risk and require disposal.
FAQs
How long should a Milwaukee M18 battery last?
Average lifespan reaches three to five years with good care. Heavy daily use shortens this time.
Why does the charger blink red and green?
Blinking shows communication failure. Dirty contacts or protection lock cause this signal.
Can a reset restore lost capacity?
Reset clears electronic locks only. Lost capacity from aging stays permanent.
How many reset attempts stay safe?
Two or three attempts remain safe. More attempts bring no benefit.
Do all M18 batteries reset the same way?
All M18 batteries use similar protection systems. Methods stay the same across sizes.
Conclusion
Milwaukee M18 battery reset methods solve many charging problems. Understanding protection systems helps prevent future issues.
Clean contacts, correct temperature, and proper storage improve battery life. Simple care steps reduce downtime and keep tools ready for work.