Removing a Milwaukee drill chuck might seem tricky, but the process becomes simple with the right approach. Understanding the components of your drill ensures every step goes smoothly.
Most Milwaukee drills feature keyless or keyed chucks, and knowing which type you have saves time and prevents damage. Start by securing the drill and loosening the chuck’s jaws. Using the correct tools prevents slippage and protects both the drill and your hands.
Applying a bit of force in the right direction releases the chuck without strain. Proper maintenance after removal keeps your drill performing at its best. Technicians and DIY enthusiasts appreciate a methodical approach, as it reduces the chance of errors.
Safety remains a priority; wearing gloves and keeping a firm grip avoids accidents. Mastering chuck removal equips you to swap bits efficiently, handle repairs confidently, and extend the life of your Milwaukee drill.
How to Remove Milwaukee Drill Chuck?
A drill chuck holds drill bits securely. Over time, it can wear out, get stuck, or need cleaning. Removing it correctly keeps the drill working longer. Milwaukee drills are strong and precise. Their chucks are reliable but need proper handling when removal is necessary.
A worn or stuck chuck can reduce drilling accuracy. Removing the chuck allows cleaning of dust, metal shavings, or grease buildup. It also allows replacing the chuck with a new one. This guide explains the process step by step, including tools, techniques, and safety precautions.
To remove a Milwaukee drill chuck safely, gather these tools:
-
Hex key (Allen wrench): Needed to remove some chuck screws, typically 5mm or 6mm depending on the model.
-
Screwdriver: A flathead or Phillips screwdriver may work depending on your chuck screw type.
-
Hammer or rubber mallet: Helps to gently tap off tight chucks. Do not use metal hammers directly on the drill body.
-
Work gloves: Protect your hands from cuts, dirt, or grease.
-
Safety glasses: Protect your eyes from debris.
Extra helpful items: cloth for cleaning, light machine oil, and small container to hold screws.
Step 1: Safety First and Drill Preparation
Unplug the drill if it is corded. Remove the battery if it is cordless. Safety prevents accidents. Hold the drill on a flat, stable surface. Avoid working in awkward positions to prevent slips.
Check the drill for dust or old oil. Clean the outer surface. This makes it easier to see the chuck screw and spindle clearly.
Step 2: Open the Chuck Fully
Turn the chuck collar counterclockwise until the jaws are wide open. Open jaws make the central screw visible. Milwaukee chucks often have a keyless system, but the internal screw still secures it.
Wide opening prevents damage to jaws when removing the chuck. Check that the chuck spins freely. A stuck chuck may indicate rust, dried grease, or debris inside.
Step 3: Locate the Chuck Screw
Look inside the chuck. You will see a small screw at the center. Most Milwaukee drill chucks use a left-hand thread.
Left-hand thread means:
-
Turn clockwise to loosen.
-
Turn counterclockwise to tighten.
Screw size varies: standard cordless Milwaukee drills often use M4 or M5 screws. Measure or check the manual if unsure.
Step 4: Remove the Chuck Screw
Select a screwdriver that fits the screw properly. A loose fit can strip the screw. Turn clockwise to loosen. Apply steady pressure.
Remove the screw completely. Keep it in a safe container. This screw is critical because it holds the chuck to the spindle. Without removing it, the chuck cannot come off.
Extra tip: Apply penetrating oil if the screw is tight. Let it sit 5–10 minutes. This softens rust or old grease.
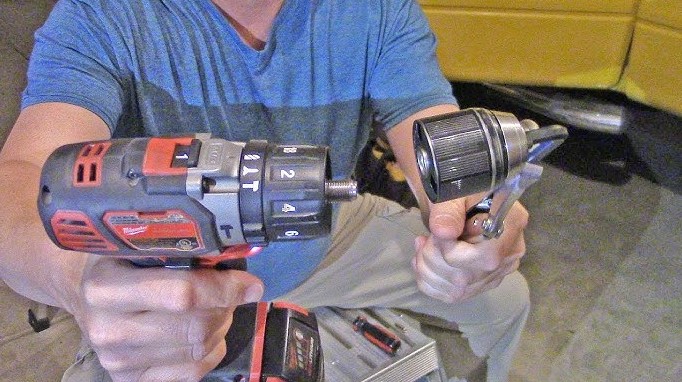
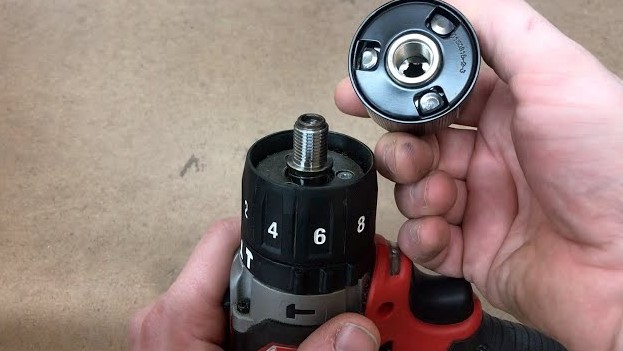
Step 5: Remove the Chuck from the Spindle
After the screw is out:
-
Grip the chuck with one hand.
-
Hold the drill body with the other hand.
-
Pull the chuck straight off the spindle.
Some chucks may stick due to rust or old grease. Lightly tap the back of the chuck with a rubber mallet. Avoid hitting the drill body.
Data point: Milwaukee keyless chucks can handle torque up to 50 Nm. Over time, high torque can tighten the chuck screw more than expected, making removal slightly harder.
Step 6: Clean the Drill Spindle
Use a clean cloth to wipe the spindle. Remove dust, small metal shavings, and old grease. Apply a thin layer of light machine oil. This prevents rust and helps the new chuck slide on easily.
Extra tip: Use a small brush for hard-to-reach grooves inside the spindle. Milwaukee spindles are often precision-machined, and even small debris can reduce chuck performance.
Step 7: Install a New or Cleaned Chuck
-
Slide the new or cleaned chuck onto the spindle.
-
Insert the screw and tighten counterclockwise (left-hand thread).
-
Close the chuck jaws fully.
-
Test with a drill bit.
Check that the chuck grips the bit firmly. Spin it by hand. If it feels loose, tighten the screw slightly.
Data insight: A properly installed chuck can maintain bit stability up to 13,000 RPM on corded Milwaukee drills. Poor installation can reduce accuracy and increase bit wear.
Extra Tips and Tricks
-
Always remove power or battery first. Safety comes first.
-
Match screwdriver size to the chuck screw. Avoid stripping threads.
-
Avoid excessive force. Gentle tapping works best for stubborn chucks.
-
Keep removed screws and parts in a small container. Prevents loss.
-
Lightly lubricate the chuck jaws before reinstallation to prevent future sticking.
FAQs
Q1: Can I remove the chuck without removing the screw?
No. The central screw holds the chuck in place. Without removing it, the chuck will not come off.
Q2: Why does the chuck feel stuck?
Dust, rust, or hardened grease can bind the chuck. Light tapping and lubrication usually free it.
Q3: Can I use a metal hammer on the drill?
Avoid striking the drill body. Only tap the back of the chuck lightly. A rubber mallet works best.
Q4: How often should I remove the chuck?
Routine cleaning every 6–12 months prevents buildup. More frequent removal may be needed in dusty or heavy-use environments.
Q5: Will removing the chuck affect drill warranty?
No, as long as you do not damage the drill or parts. Handle carefully and follow manufacturer guidelines.
Conclusion
Removing a Milwaukee drill chuck is simple with the right tools and steps. Open the chuck, remove the screw, pull off the chuck, clean the spindle, and reinstall. Proper maintenance prevents stuck chucks, increases drill life, and keeps drilling precise. Regular cleaning and correct handling make the drill more reliable and safe for long-term use.