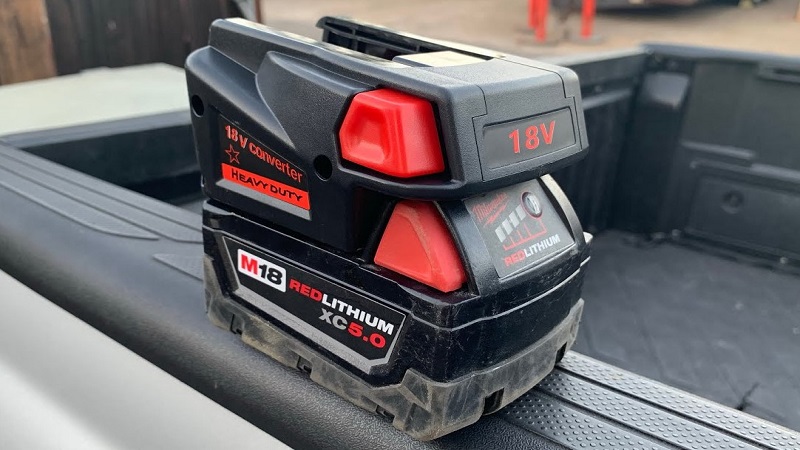
A dead tool battery can stop your work in seconds. Many DIY users and jobsite pros rely on the Milwaukee M18 Battery for strong and steady performance. Trouble starts when the original charger goes missing or stops working. You still have options, but safety must stay your top priority.
Wrong methods can damage the battery cells, reduce lifespan, or even cause fire risks. Smart handling and the right tools make a big difference. This guide explains practical ways to charge a Milwaukee M18 battery without the standard charger.
You will learn what works, what to avoid, and how to protect your battery investment. Clear steps and simple explanations help you understand each option.
Power tools cost money, so proper battery care protects both performance and your budget. Let’s explore safe alternatives that keep your projects moving.
How to Charge Milwaukee M18 Battery without Charger?
Work can stop fast when your battery dies. Many tools run on the Milwaukee M18 Battery. This battery gives 18 volts of strong power. Builders, mechanics, and home users depend on it every day.
Trouble starts when the charger is missing or broken. You may need a quick solution. You may think about charging the battery in another way.
This guide explains deeper details about how to charge Milwaukee M18 battery without charger. You will learn voltage data, battery structure, charging limits, and real risks. Read carefully. Lithium batteries need respect.
Know the Battery Specifications
Before you try any method, understand the numbers.
Voltage Details
-
Nominal voltage: 18V
-
Full charge voltage: about 20V to 20.5V
-
Cut-off voltage (empty): around 14V to 15V
The battery pack contains five lithium-ion cells in series. Each cell has:
-
Nominal voltage: 3.6V
-
Full voltage: 4.2V
-
Safe low limit: 3.0V
5 cells × 4.2V = 21V maximum
That explains why full charge sits near 20V.
Capacity Ratings
Milwaukee M18 batteries come in different amp-hour (Ah) ratings:
-
1.5Ah
-
2.0Ah
-
3.0Ah
-
4.0Ah
-
5.0Ah
-
6.0Ah
-
8.0Ah
-
12.0Ah
Higher Ah means longer runtime. It does not change voltage. It changes how long the tool runs.
How Lithium-Ion Charging Works
Lithium-ion batteries follow two charging stages:
Stage 1: Constant Current (CC)
The charger sends steady current. Voltage slowly rises.
Example:
A 5.0Ah battery often charges at 2A to 3A.
Stage 2: Constant Voltage (CV)
Voltage reaches 20V to 20.5V.
Current slowly drops.
Charging stops when current becomes very low.
This process protects battery life. Manual charging must copy this pattern as close as possible.
Method 1: Adjustable DC Power Supply (Most Controlled Option)
This method gives better control than other emergency methods.
Equipment Required
-
Adjustable DC bench power supply (0–30V range)
-
Multimeter
-
Insulated alligator clips
-
Fire-resistant surface
Step-by-Step Guide
-
Set voltage to 20V.
-
Set current limit to 2A for small batteries.
-
Connect positive to positive terminal.
-
Connect negative to negative terminal.
-
Turn power supply on.
-
Monitor voltage and temperature every 5–10 minutes.
-
Stop charging once voltage reaches 20V to 20.5V.
Charging Time Estimate
Example for 5.0Ah battery:
Charging at 2A
5Ah ÷ 2A = about 2.5 hours
Real time may vary due to efficiency loss.
Why Current Limit Matters
Too much current causes heat. Heat above 50°C can damage lithium cells. Warm is normal. Hot is dangerous.
Method 2: Car Battery with Boost Converter
A 12V car battery alone cannot charge an 18V pack. Voltage is too low.
You need:
-
12V car battery
-
DC boost converter (12V to 20V output)
-
Multimeter
Setup Instructions
-
Connect boost converter to 12V battery.
-
Adjust output to 20V using multimeter.
-
Set current limit to around 2A.
-
Connect output to M18 battery terminals.
-
Watch voltage every few minutes.
-
Disconnect at 20V.
Important Data
Car battery voltage:
-
Engine off: around 12.6V
-
Engine running: 13.7V to 14.4V
Boost converter raises voltage to required level.
Never connect directly without converter. Direct 12V input will not charge battery fully.
Method 3: Solar Panel with Charge Controller
This method works outdoors.
Required Items
-
24V solar panel
-
DC charge controller
-
Voltage adjustment control
Solar panel must produce more than 20V. A charge controller regulates output.
Clouds reduce voltage. Charging speed changes during the day.
Solar charging works slowly but safely if controller handles regulation.
Terminal Identification
The Milwaukee M18 Battery has multiple terminals:
-
Positive (+)
-
Negative (–)
-
Data or temperature pins
Only connect to positive and negative. Never connect to small signal pins. Wrong connection may damage internal battery management system.
Temperature Limits
Safe charging temperature range:
-
5°C to 40°C
Do not charge below freezing. Cold cells cannot accept charge safely.
Stop charging if:
-
Battery feels very hot
-
You see swelling
-
You smell burning
Lithium batteries can catch fire if damaged.
Risks of Charging without Official Charger
The official charger from Milwaukee Tool provides:
-
Automatic shut-off
-
Overcharge protection
-
Overheat monitoring
-
Balanced charging
Manual charging skips some of these protections.
Possible risks:
-
Shortened battery life
-
Cell imbalance
-
Fire hazard
-
Internal damage
Repeated unsafe charging reduces total cycle life. A good lithium battery may last 500 to 1,000 cycles with proper charging. Poor charging reduces this number.
Signs of Battery Damage
Watch for these warning signs:
-
Battery drains too fast
-
Tool loses power quickly
-
Battery gets hot during use
-
Visible swelling
-
Cracks or leaks
Stop using damaged batteries immediately.
Practical Example Calculation
Example: 4.0Ah battery at 15V (almost empty)
Target full voltage: 20V
Voltage increase needed: 5V
Charging at 2A:
4Ah ÷ 2A = 2 hours
Add 20–30 minutes for CV stage.
Total time: around 2 to 2.5 hours.
What You Must Never Do?
-
Connect battery directly to wall AC power.
-
Use random 24V adapter without checking voltage.
-
Leave charging battery overnight.
-
Charge near flammable items.
-
Short circuit terminals.
Short circuit can create sparks and instant heat.
Emergency Use Only
Manual charging helps in urgent cases. It should not replace a real charger. Regular use increases risk and lowers battery health.
Buying a replacement charger often costs less than replacing a damaged battery.
FAQs
Can I charge Milwaukee M18 battery with a 19V adapter?
19V may start charging, but it may not reach full 20V. Adapter must support current limit and stable DC output.
What current is safest for charging?
Around 0.5C rate works well. For 5Ah battery, 2A to 2.5A is safe.
How do I check battery voltage?
Use a digital multimeter. Touch probes to positive and negative terminals.
Can overcharging explode the battery?
Severe overcharge can cause overheating and fire. Stop charging at 20V to 20.5V.
Does slow charging increase battery life?
Yes. Lower current creates less heat. Less heat helps cells last longer.
Conclusion
This guide explained in detail how to charge Milwaukee M18 battery without charger using controlled power sources. Correct voltage, limited current, and temperature monitoring remain critical.
Lithium-ion cells demand careful handling. Emergency charging works only with strict attention and basic electrical knowledge. Official chargers remain the safest and most reliable option for long-term battery health.