A dead tool battery can stall progress fast, especially in the middle of an important project. Milwaukee batteries power some of the toughest jobsite tools, so losing charge at the wrong moment feels frustrating and costly.
Many people assume a dedicated charger stands as the only solution, but several practical alternatives exist. Resourceful DIYers and contractors often rely on creative yet safe methods to restore power in urgent situations.
This guide explores realistic ways to charge a Milwaukee battery without its original charger while keeping safety front and center. Clear steps and practical tips help reduce risk and protect battery life.
You will also learn what to avoid so you don’t damage expensive equipment. With the right approach, you can get back to work quickly and confidently without waiting around for a replacement charger.
Table of Contents
ToggleHow to Charge Milwaukee Battery without Charger?
Power tools stop fast when the battery dies. Many workers depend on Milwaukee Tool every day. These tools run on lithium-ion battery packs. The charger controls voltage, current, and heat. That control keeps the battery safe.
A missing charger creates a problem. You can still charge the battery in an emergency. Care and correct setup matter. Small mistakes can damage the cells inside. This guide explains each method in deeper detail. Simple steps. Clear data. Real safety focus.
Understand How Milwaukee Batteries Work
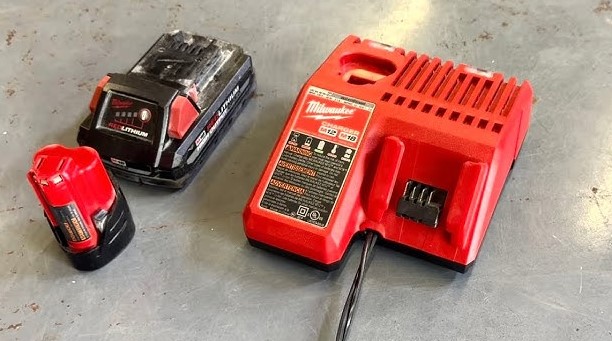
Most packs such as the Milwaukee M18 Battery and Milwaukee M12 Battery use lithium-ion cells.
Basic Battery Facts
-
M12 battery nominal voltage: 12V
-
M18 battery nominal voltage: 18V
-
Fully charged M12: about 12.6V
-
Fully charged M18: about 20V
-
Cell voltage range: 3.0V to 4.2V per cell
An M18 pack usually contains 5 cells in series (5 × 4.0V approx = 20V max).
An M12 pack usually contains 3 cells in series.
Voltage must match the pack rating. Too much voltage causes overheating. Too little voltage will not charge the battery fully.
Battery Capacity
Capacity appears in amp-hours (Ah).
Common ratings:
-
2.0Ah
-
4.0Ah
-
5.0Ah
-
6.0Ah
-
8.0Ah
-
12.0Ah
Higher Ah means longer runtime. Charging time increases with higher capacity.
Example:
A 5.0Ah battery charged at 2 amps takes about 2.5 to 3 hours.
Why the Original Charger Matters?
The original charger from Milwaukee Tool controls:
-
Constant current stage
-
Constant voltage stage
-
Temperature monitoring
-
Auto shutoff
Charging happens in two main steps:
-
Constant Current Phase
Charger sends steady current until voltage rises near maximum. -
Constant Voltage Phase
Charger keeps voltage steady while current slowly drops.
Manual charging methods do not manage these stages perfectly. That increases risk.
Safety Rules You Must Follow
Electric power can burn skin. Short circuits can cause sparks. Lithium cells can catch fire under stress.
Follow these safety rules:
-
Work on a dry wooden table
-
Keep flammable items away
-
Use insulated gloves
-
Use a multimeter
-
Never leave battery unattended
-
Stop if battery temperature rises above 50°C
Normal charging temperature stays between 10°C and 45°C. Heat above that signals danger.
Method 1: Charge with Adjustable DC Power Supply
This method works best for users who understand voltage and current control.
Tools Needed
-
Adjustable DC power supply
-
Multimeter
-
Insulated wires with clips
Step 1: Set Correct Voltage
Set voltage slightly below full charge level.
For M18:
-
Set 20V maximum
-
Start at about 18V
For M12:
-
Set 12.6V maximum
-
Start at about 12V
Never exceed full charge voltage.
Step 2: Limit Current
Safe charging current equals about 0.5C.
C = battery capacity.
Example:
5.0Ah battery
0.5C = 2.5 amps
Set current limit to 2–2.5 amps.
Lower current increases safety but increases charging time.
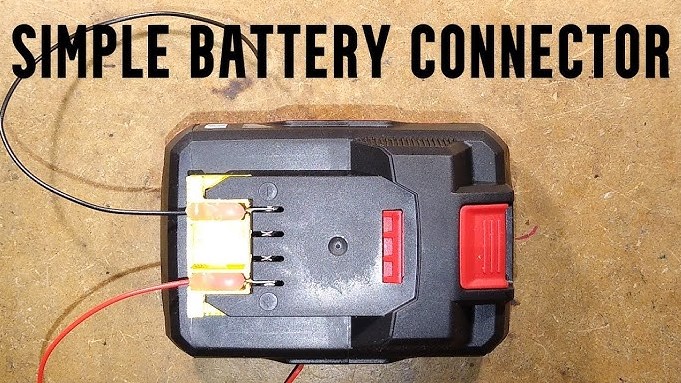
Step 3: Connect Terminals
-
Red wire to positive terminal
-
Black wire to negative terminal
Check polarity twice. Wrong connection causes spark and damage.
Step 4: Monitor Voltage and Heat
Check voltage every 10–15 minutes.
Touch battery carefully to feel heat.
Stop charging once voltage reaches:
-
20V for M18
-
12.6V for M12
Overcharging shortens battery life.
Method 2: Use a Car Battery with Voltage Regulator
A car battery provides about 12.6V when fully charged.
This method suits M12 batteries better. M18 packs need step-up converter, which increases risk.
Required Equipment
-
12V car battery
-
DC voltage regulator
-
Multimeter
Why Regulator Is Important
Car batteries provide high current. Direct connection pushes too much current into tool battery. That may damage internal cells.
Voltage regulator keeps output stable and limits current.
Steps
-
Connect car battery to regulator input.
-
Set regulator output to correct voltage.
-
Connect regulator output to tool battery.
-
Monitor closely.
Check voltage every few minutes. Remove power at full voltage.
Method 3: Parallel Battery Transfer
This method connects a full battery to an empty one.
Only attempt if both batteries:
-
Have same voltage
-
Have same model
How It Works
Energy flows from higher voltage battery to lower voltage battery. Voltage slowly balances.
Steps
-
Measure voltage of both batteries.
-
Connect positive to positive.
-
Connect negative to negative.
-
Leave connected for short time only.
Voltage difference must stay small. Large difference causes heavy current flow.
Example:
Full battery: 20V
Empty battery: 15V
Difference: 5V
This difference may cause strong current. Limit time to short periods.
Check temperature often.
This method only gives partial charge. It helps start work but does not fully charge pack.
Risks of Manual Charging
Manual charging creates several risks:
-
Cell imbalance
-
Overheating
-
Internal damage
-
Reduced lifespan
-
Fire hazard
Lithium-ion cells contain chemical electrolyte. Excess heat breaks internal structure. Damaged cells may swell or leak. Battery pack also contains protection circuit. Some manual methods bypass protection system. That increases danger.
Signs of Overcharge or Damage
Stop charging if you notice:
-
Battery too hot to touch
-
Plastic case softens
-
Smell like burning plastic
-
Bulging shape
-
Voltage rising above limit
Damaged battery should not return to use.
Charging Time Estimates
Charging time depends on current.
Example for 5.0Ah battery:
-
At 1 amp → about 5 hours
-
At 2 amps → about 2.5–3 hours
-
At 3 amps → about 2 hours
Higher current increases heat. Moderate current improves safety.
Best Long-Term Solution
Emergency charging helps only for short time. A proper replacement charger protects:
-
Battery life
-
Tool performance
-
Personal safety
Replacement chargers cost far less than new battery packs.
FAQs
Can I charge Milwaukee battery directly with wall power?
No. Wall outlets provide AC power at high voltage. Battery requires controlled DC voltage.
Can I use solar panel?
Yes, but only with a charge controller. Solar panel without controller can overcharge battery.
How low can battery voltage drop before damage?
Lithium cells should not drop below about 3.0V per cell. Deep discharge reduces lifespan.
Does slow charging increase battery life?
Yes. Lower current produces less heat. Less heat protects internal cells.
Can damaged battery explode?
Serious damage can cause fire. Swelling or strong heat means stop using it.
Conclusion
Charging a Milwaukee battery without the original charger requires caution and knowledge. Correct voltage and current protect the internal lithium cells. Constant monitoring reduces risk.
Manual charging should stay an emergency solution only. A proper charger remains the safest and most reliable choice for long-term battery health and stable tool performance.