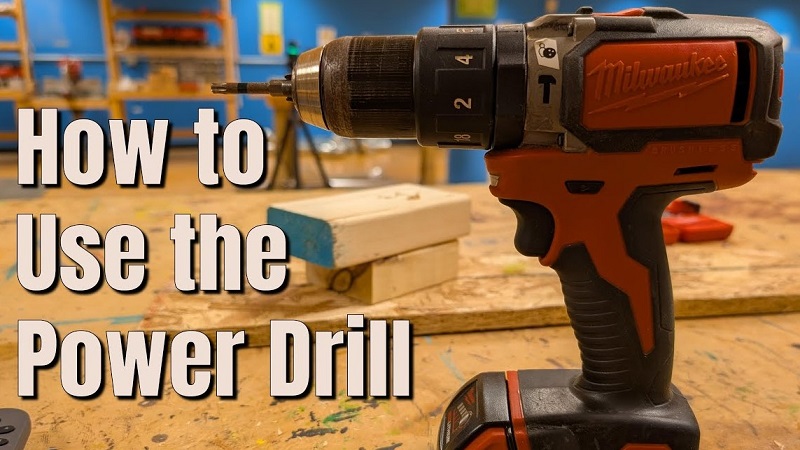
A Milwaukee drill gives you power, speed, and control for home and jobsite tasks. Many beginners feel unsure about settings, bits, and safety steps. Clear guidance makes the process easy and safe.
This guide explains how to use a Milwaukee drill with simple steps that anyone can follow. You will learn how to insert the battery, adjust torque, select drill or driver mode, and change bits correctly.
Proper grip and body position help you drill straight and avoid slips. Speed control plays a big role in clean holes and tight screws. Right bit choice also protects your material and your tool.
Safety matters at every step, so eye protection and a steady surface should stay part of your routine. Practice builds confidence fast. Soon, you will handle wood, metal, and light masonry tasks with smooth and accurate results.
Table of Contents
ToggleHow to Use Milwaukee Drill?
A Milwaukee drill helps you drill holes and drive screws with speed and control. Many homeowners and workers trust tools from Milwaukee Tool for daily tasks. Strong motor. Solid grip. Clear controls.
This guide explains how to use a Milwaukee drill in deeper detail. You will learn about torque, speed, battery types, drill bits, safety, and real job examples. Short steps. Simple words. Clear actions.
Types of Milwaukee Drills
Milwaukee makes different drill types. Each type serves a purpose.
Drill Driver
A drill driver handles wood, plastic, and thin metal. It drills holes and drives screws. Most home users choose this type.
Power range: 12V to 18V.
Common torque: 300 to 600 inch-pounds.
Good for:
-
Furniture assembly
-
Hanging shelves
-
Installing cabinets
Hammer Drill
A hammer drill adds a small hammer action. It helps drill into brick and concrete.
Blows per minute: up to 25,000 BPM in many 18V models.
Use masonry bits for best results.
Good for:
-
Wall anchors
-
Concrete screws
-
Light construction
Impact Driver
An impact driver focuses on driving long screws and bolts. It delivers high torque.
Torque can exceed 1,500 inch-pounds in many 18V models.
Good for:
-
Deck building
-
Lag bolts
-
Heavy screws
Each tool looks similar but works in a different way.
Understanding Voltage and Power
Voltage tells you the power level.
-
12V (M12 line) – Light weight. Good for small jobs.
-
18V (M18 line) – More power. Handles tough tasks.
Higher voltage means more torque and longer runtime. Weight also increases. Choose based on your job type.
Battery and Runtime Details
Milwaukee batteries use lithium-ion cells.
Common battery sizes:
-
2.0Ah
-
4.0Ah
-
5.0Ah
-
8.0Ah
Ah means amp-hour. Higher Ah gives longer runtime.
Example:
-
2.0Ah battery may drill 100–150 small wood holes on one charge.
-
5.0Ah battery may drill 300+ holes in softwood.
Heavy tasks drain faster. Thick metal or concrete uses more power.
Battery Care Tips
-
Store at room temperature.
-
Avoid full drain often.
-
Keep battery clean and dry.
Good battery care extends life to 2–3 years or more.
Drill Bit Types and Uses
The right bit gives clean results.
Twist Bit
Best for wood, plastic, and light metal.
Common sizes: 1/16 inch to 1/2 inch.
Spade Bit
Drills large holes in wood.
Fast but rough finish.
Masonry Bit
Used for brick and concrete.
Hard tip handles stone surfaces.
Hole Saw
Cuts large round holes for pipes and wires.
Always match the bit to the material. Wrong bit reduces speed and causes damage.
Step-by-Step: Drilling Into Wood
Wood drilling feels simple but needs control.
-
Mark the spot clearly.
-
Clamp the wood in place.
-
Select high speed.
-
Use drill mode.
-
Start slow, then increase speed.
Apply steady pressure. Too much force can split the wood.
For deep holes:
-
Pull the bit out halfway.
-
Clear wood chips.
-
Continue drilling.
Clean hole. Smooth edge.
Step-by-Step: Drilling Into Metal
Metal requires slower speed.
-
Mark the spot with a center punch.
-
Select low speed.
-
Use cutting oil on the bit.
-
Drill slowly.
Metal heats quickly. Pause if the bit gets hot.
Use sharp bits only. Dull bits cause slipping.
Step-by-Step: Drilling Into Concrete
Concrete needs hammer mode.
-
Insert masonry bit.
-
Set drill to hammer mode.
-
Choose high speed.
-
Hold drill with both hands.
Apply steady forward pressure. Do not force hard. Let the hammer action break the surface.
Dust will come out. Clear dust often.
Driving Screws With Precision
Driving screws requires clutch control.
Lower clutch numbers protect small screws.
Higher numbers drive larger screws deeper.
Test on scrap material first.
Keep drill straight.
Press trigger gently at first.
Stop once screw head sits flush.
Overdriving damages wood and strips screws.
Torque and Speed Explained
Torque means turning strength.
Low torque:
-
Small screws
-
Soft wood
High torque:
-
Thick screws
-
Hard wood
Speed matters too.
High speed:
-
Drilling small holes
Low speed:
-
Driving screws
-
Large hole drilling
Balance torque and speed for best results.
Grip and Body Position
Body position affects control.
Stand stable.
Keep feet apart.
Hold drill with both hands during heavy work.
Keep wrist straight.
Avoid sudden force.
Good posture reduces fatigue.
Heat and Motor Protection
Long drilling creates heat.
Signs of overheating:
-
Hot smell
-
Reduced power
-
Battery drains fast
Stop for a few minutes. Let the motor cool.
Modern Milwaukee drills include overload protection. The tool may stop to prevent damage.
Common Mistakes to Avoid
-
Using wrong speed for metal
-
Applying too much pressure
-
Forgetting to tighten chuck
-
Ignoring clutch settings
-
Using dull bits
Small mistakes reduce tool life and job quality.
Cleaning and Storage
Dust collects inside vents.
After use:
-
Remove battery
-
Wipe surface with dry cloth
-
Blow dust from vents
Store in a dry toolbox.
Check chuck movement every few months.
Real Job Example
Installing wall shelves.
Tools needed:
-
Drill driver
-
3/16 inch bit
-
Screwdriver bit
-
Wall anchors
Steps:
-
Mark level line.
-
Drill holes in wall.
-
Insert anchors.
-
Drive screws into anchors.
-
Mount shelf.
Simple steps. Strong hold.
FAQs
1. How tight should I tighten the chuck?
Turn it firm by hand. Bit should not move or wobble.
2. Why does the drill stop suddenly?
Battery may be low. Overload protection may activate. Check settings.
3. How long does a Milwaukee drill last?
With good care, the tool can last 5–10 years. Battery may need replacement earlier.
4. Can I use one battery for different Milwaukee tools?
Yes. Batteries in the same series, such as M12 or M18, fit matching tools.
5. Why does my screw head strip?
Clutch may be too high. Speed may be too fast. Use lower setting.
Conclusion
A Milwaukee drill handles many home and work tasks with strength and control. Clear setup, correct bit choice, proper speed, and safe handling improve results.
Learn torque and clutch settings. Maintain the battery and clean the tool after use. Practice on scrap material before big projects. Skill grows with use. Safe work always comes first.