Maintaining a neat lawn requires a sharp string trimmer. A Milwaukee string trimmer delivers powerful performance, but its efficiency depends on proper line winding. Many homeowners struggle with tangled or uneven string, which slows down yard work and causes frustration.
Understanding the right method saves time and keeps the trimmer working at its best. This guide walks through each step clearly, showing how to wind the trimmer without mistakes. Using the correct line size and following simple winding directions ensures smooth operation and longer-lasting performance.
Even beginners can tackle this task confidently with proper guidance. Avoid frequent stops to fix broken or jammed string by preparing the spool correctly from the start.
Mastering this technique not only improves cutting efficiency but also prolongs the life of the trimmer. A well-prepped Milwaukee string trimmer makes yard work faster, easier, and more satisfying.
How to Wind a Milwaukee String Trimmer?
Keeping a string trimmer in good shape saves time and effort. The cutting line wears out quickly and must be replaced often. Winding a new line correctly prevents jams, uneven cutting, and damage to the trimmer head.
This guide explains every step in detail, with extra tips to make the process simple and reliable. Even beginners can follow these instructions without confusion.
Understanding the Milwaukee Trimmer Head
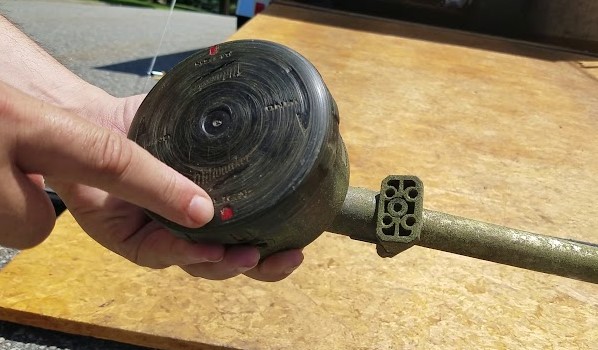
The trimmer head is the part that holds and releases the cutting line. Milwaukee string trimmers commonly use bump-feed or tap-and-go heads.
These systems feed line automatically when you tap the head on the ground.
Types of Trimmer Lines
-
Single-line spool: Uses one line for cutting. Suitable for light trimming.
-
Dual-line spool: Uses two lines at once for faster and stronger cutting. Best for thicker grass.
The line’s thickness matters. Using the wrong diameter can strain the motor or prevent proper feeding. Always check your trimmer manual for the recommended size.
Tools and Materials Needed
-
Correct Milwaukee trimmer line (diameter shown in the manual)
-
Scissors or sharp knife
-
Cloth to clean dust and grass debris
Optional: gloves for better grip and protection from small cuts.
Step-by-Step Guide to Wind a Milwaukee String Trimmer
Step 1: Remove the Trimmer Head
-
Press the tabs on both sides of the head and lift the spool out. Some models require twisting the head instead.
-
Wipe the inside of the head with a cloth to remove dust, dirt, and old line bits. A clean head makes winding smooth and prevents line tangles.
Step 2: Measure and Cut the Trimmer Line
-
Cut 10–15 feet of line. Too short causes frequent replacements. Too long may jam the spool.
-
Make sure the line is straight and smooth. Curled or bent line can tangle easily.
Step 3: Locate the Anchor Hole
-
Check the spool for a small hole or slot.
-
Insert one end of the line into the hole. Pull it tight until it stays firmly in place. This anchor keeps the line from slipping while winding.
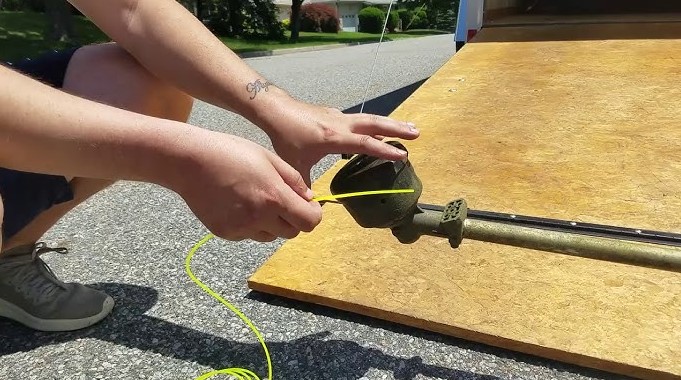
Step 4: Winding the Line
-
Check the arrow on the spool showing the winding direction. Wind in this direction only. Winding the opposite way causes line jams.
-
Single-line spools: Wind the entire line onto one side. Keep coils tight, neat, and close together.
-
Dual-line spools: Divide the line into two equal parts. Wind each half on the correct side, following arrows.
Tips for Tight and Even Coils:
-
Use your fingers to guide the line as you wind.
-
Avoid overlapping or crossing lines.
-
Keep moderate tension. Too tight can make it hard to release line, too loose can tangle.
Step 5: Secure the Ends
-
Leave about 6 inches of free line at the ends.
-
Hook them into the small notches on the spool. This keeps the line in place during reassembly.
Step 6: Reinstall the Spool
-
Place the spool back into the trimmer head. Make sure the tabs align correctly or twist it until it clicks in place.
-
Pull the free ends through the holes in the trimmer head.
-
Press the spool down gently until it locks. Ensure it rotates freely when tapped.
Step 7: Test the Trimmer
-
Turn the trimmer on and lightly tap the head on the ground. The line should extend smoothly.
-
Trim a small patch of grass to confirm proper feeding. If the line doesn’t feed, check for tangles or improper winding.
Extra Tips for Better Performance
-
Store extra trimmer line at home for quick replacements.
-
Avoid cutting hard surfaces like rocks, concrete, or tree roots. These break the line quickly.
-
Replace the line before it becomes too short. Short line can overheat the trimmer motor.
-
Keep the trimmer head clean. Grass buildup slows down line release.
-
Use line designed for your model. Cheap or incorrect line can snap easily.
Common Problems and Fixes
| Problem | Cause | Fix |
|---|---|---|
| Line snaps frequently | Wrong thickness, hits rocks | Use correct diameter, avoid hard surfaces |
| Line won’t feed | Improper winding, tangled line | Rewind spool carefully, follow arrows |
| Spool jams | Too long line, loose coils | Cut proper length, wind tight and neat |
| Motor strain | Line too thick or uneven | Match recommended line size, wind evenly |
FAQs
Q1: How often should I replace the trimmer line?
Replace it whenever it becomes short, frayed, or breaks. Heavy use may require weekly replacement.
Q2: Can I use any trimmer line for Milwaukee?
No. Use line that matches the trimmer’s diameter and type. Wrong line can damage the spool or motor.
Q3: Why does my trimmer line break easily?
Breaks happen due to hitting hard surfaces, using too thin line, or winding loosely.
Q4: Can I wind the line without removing the spool?
Removing the spool makes winding easier and prevents tangles. Winding in place can cause uneven coils.
Q5: How long should the free ends be?
Leave around 6 inches on each side. Secure in the notches before reinstalling.
Conclusion
Winding a Milwaukee string trimmer is simple if done carefully. Correct line type, proper winding, and regular cleaning make trimming easier and faster.
A well-wound spool prevents jams, protects the motor, and extends line life. Regular maintenance saves time and avoids frustration in the yard. Follow these steps, and your trimmer will always perform at its best.